Pages

Friday, June 27, 2014

Run Rabbit Run

Another busy week, so I'm sharing a customer's quilt for today's blog.  It's based on a poem, apparently an old one, which I never heard before:
Run rabbit run
Run rabbit run
Here comes the farmer
with his gun gun gun.
I call this kind of quilt "stone soup" and actually have a class which I teach, called Stone Soup Quilts.  It's a random sampler, taking the blocks you wish to use, and arranging them in a pleasing format, and adding other components, strips, squares, whatever it takes to make everything fit.  A very fun type of quilt to make.
This rabbit block on the corner shows a fabric that is used throughout the quilt, interspersed with pieced blocks of all kinds.
It's hard to see, but the borders are quilted with overlapping half circles, forming what looks like arches.
An appliqued rabbit, showing part of the poem.  I love quilting this type of quilt, making up the quilting design to fit each block.  It can be intimidating at first, but once the decision is made, it's fun and definitely not boring repetitiveness.
A Dutchman's Puzzle block.  Her color selections are so lovely.  She says she's using up her stash, quilting UFO's.  Sure wish I had a stash like hers!
Here's a little flower motif I designed.  It's a bit hard to see here, but one that can be used in a block, or chained together for borders.
I hope you like the rabbit quilt.  I'm pleased with the way it turned out, and hope she is too.


Friday, June 20, 2014

Fundy--A Quilt full of Lighthouses


This quilt was made following a vacation in New England.  We particularly liked the Bay of Fundy area.  Five lighthouses set amid Snail's Trail blocks representing sky and water.  Pieced back has snail's trail, star, pre-printed lighthouse fabric.  Machine pieced, machine quilted with various threads.  Lighthouses included are:  East Quoddy and Mulholland lights on Campobello Island, New Brunswick, Canada and Whitlock's Mill, West Quoddy and Lubec Channel Light in Maine. 
Getting to the East Quoddy light is an adventure in itself.  You have to go down a ladder made from pipe, about 20 feet high (I don't like heights, so that made it even more exciting for me!), across a sand bar (actually more like gravel), up another ladder, across a tiny island, down another ladder, and then pick your way across the rocks to the even smaller island where the lighthouse stands.  This must be done at low tide, as the rocks and sand bar are under water at high tide, and the tide comes in very fast, so it is extremely dangerous to attempt crossing then.
My husband thought I had completely flipped when I attempted to get a photo of  Whitlock's Mill light, which is on private property and can only be seen from a distance.  I spotted it through the trees, so we stopped and I tried to get a good view of it.  I ended up standing on the edge of a cliff  above the river, holding the branches back so I could get a picture (remember, I don't like heights).  Then we drove on, and about 100 yards up the road was a little roadside park, with a path where the lighthouse could be viewed!
I was going to show a picture of the pieced back as well, but I apparently don't have one, and the quilt is currently in an exhibit, so I can't get my hands on it to take one.  

Friday, June 13, 2014

Where Does Your Inspiration Come From?


Inspirations is the name given to my exhibit of Hoffman Challenge quilts and Lighthouse quilts at the Artworks in Big Rapids gallery.  The exhibit will hang until July 26, 2014.
I am one of a small handful of people who have entered every Hoffman Challenge which began in 1988.  All of my Hoffman Challenge quilts are on exhibit, except the first two (which I sold, not knowing I would end up with a collection), and the last two.  Last year's is traveling, and this year's was just sent off to the curator.
These are the quilts you won't see in the exhibit:
Tony's Wallstar 1988

Country Garden 1989

Garden Path 2013

Lollipop Garden 2014

Do you see a naming theme there?  Three of them have Garden in the title.  I just realized that.
Here a few shots that were taken as we were setting up the show.  The local quilt guild did the hanging and I have to say that they were very efficient.


And the other part of the exhibit (because they had a blank wall to fill, as this is a good-sized gallery) is most of my lighthouse quilts.  For some time, I have been known as "the lighthouse lady", due to my having made a lighthouse quilt which won the 200th Anniversary of the US Coast Guard quilt contest.  That sparked a line of patterns, and several more lighthouse quilts, most based on real lighthouses.


They even set up a display of my lighthouse wall hanging patterns!
If you are in the Big Rapids, Michigan area in the next few weeks, be sure to stop in and view the exhibit.  Artworks is open Tues-Fri 10-5:30 and Sat 10-3.

Thursday, June 5, 2014

Pinwheel Tutorial

The idea for this tutorial came about because a quilt that I took in for machine quilting had pinwheels, and they were very bulky in the middle.  I did a quickie demo for my quilt guild, hoping the guilty party was there (she was), and threw in a few other tips on pressing as well.  I know there are other methods which you may prefer, but this is how I like to make pinwheel blocks, or any block with eight points meeting in the center.

This is for a 6" pinwheel block.


Finished pinwheel block.

I prefer to oversize my half square triangles and square them up for accuracy.  Start with two 4" pieces, a dark and light.  Layer them right sides together, and draw a diagonal line on the light one.
Stitch 1/4" from both sides of the drawn line.  Cut on the drawn line and  open up the resulting half square triangle blocks.
Press seams OPEN and square up the blocks to 3 1/2".
Take all four half square triangle blocks and lay them out in a pinwheel formation.  It doesn't really matter which way they spin, but if you are using several in a quilt, try to keep them all spinning in the same direction.
Sew together in pairs.  Press seams open.
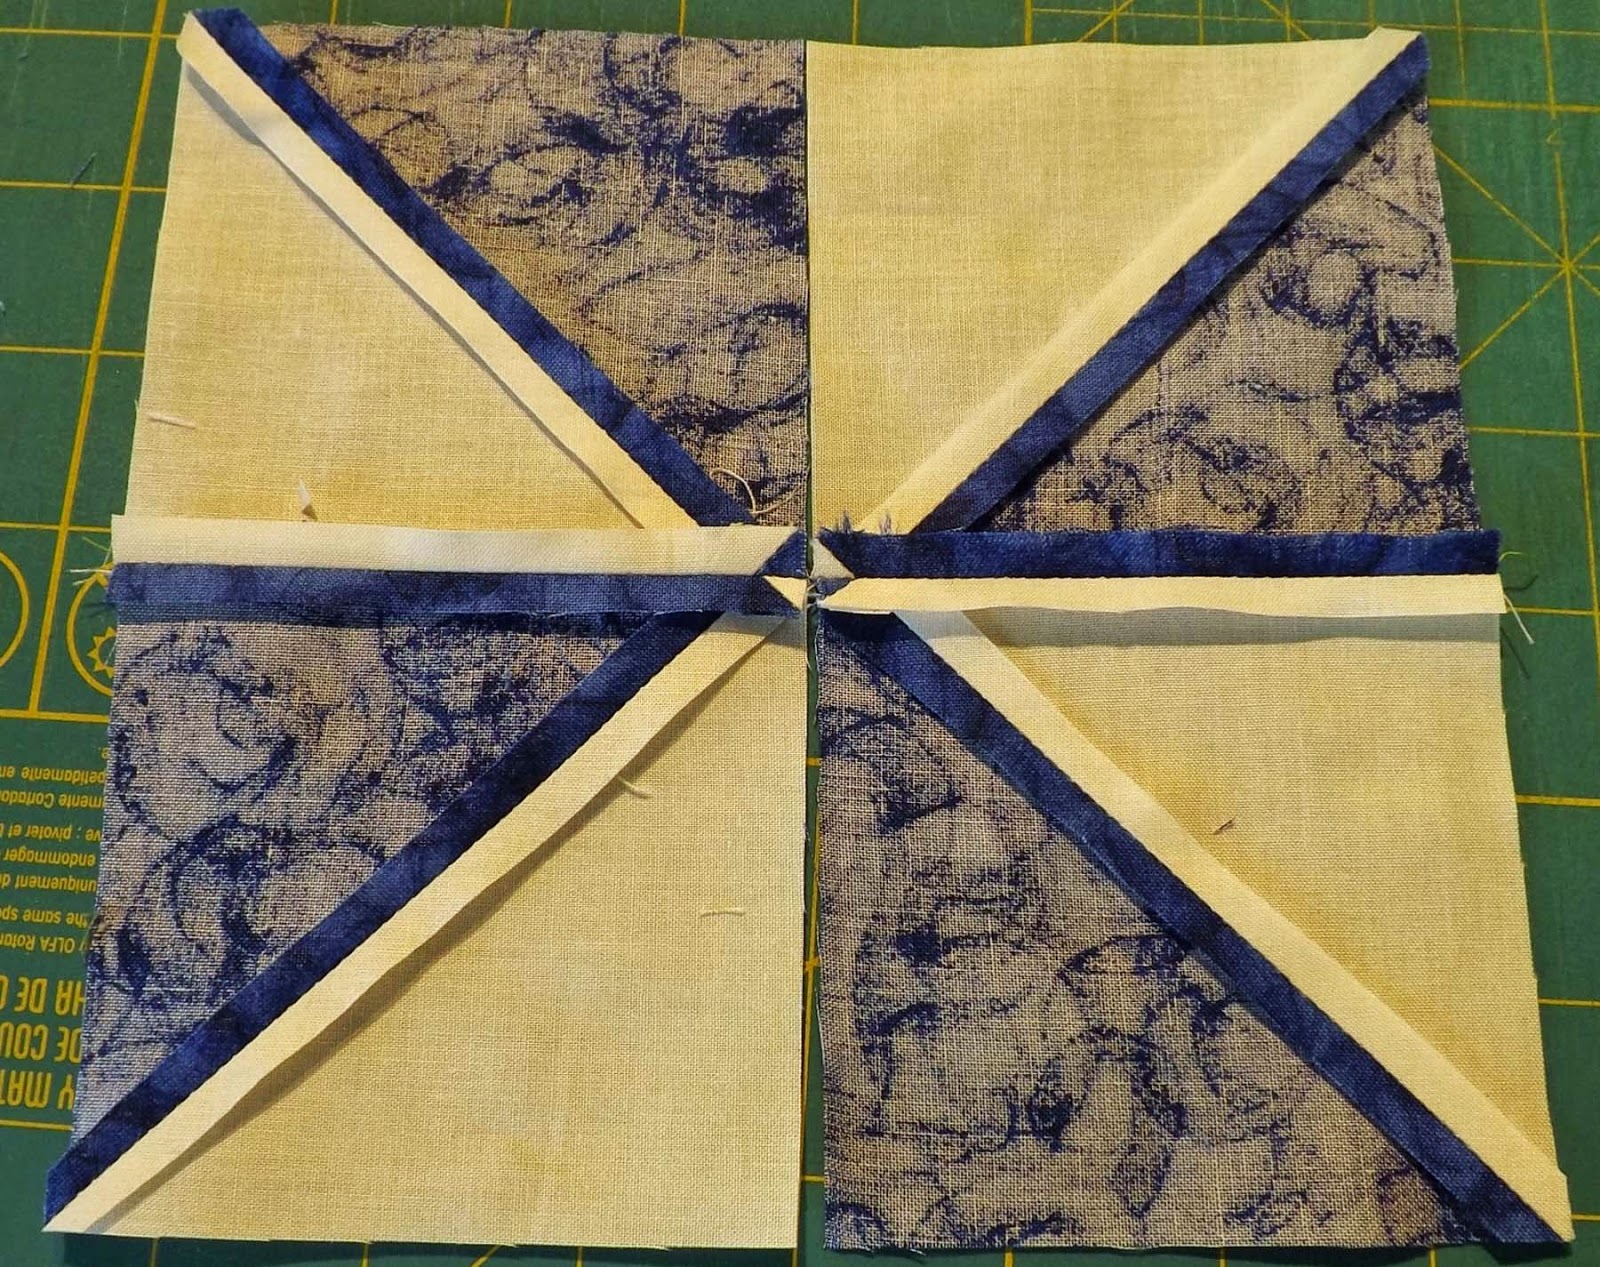
Lay the two halves with centers pointing to the middle.  They should look like this, with all seams pressed open.
Sewing the two halves together can be a little tricky to get the points to match in the middle.  To help with accuracy, line up the two centers and put a pin directly through the points where you wish to have them meet.  Don't try to tip this pin and secure the block there.  The fabric will shift if you do that.  Instead, with the pin perpendicular to the fabric, make sure the edges of the blocks line up, and pin the halves together right next to the first pin, on both sides of the seam.  Now you can take out the first pin and sew the seam, being sure to sew just a scant bit inside the point, so that it isn't eaten up when you turn and press it.  Again, press the seam OPEN to reduce bulk.  The finished block will look like this from the wrong side.
What is your favorite method for making pinwheels?